Debian11環境下Certbot DNS-01Challenge+ Cloudflareを使って、ワイルドカード証明書を取得する。
1.CloudflareのAPI TOKENを作成
Cloudflareにログイン、 https://dash.cloudflare.com/profile/api-tokens を開く。
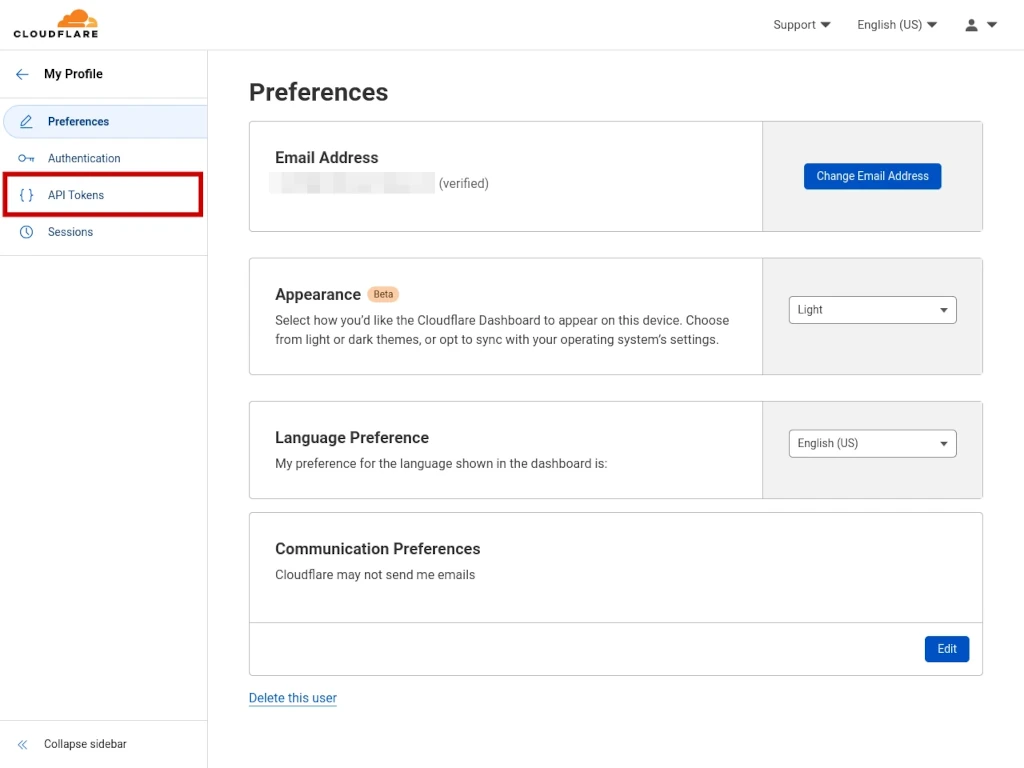
Profileページを開き、左側のAPIトークンをクリック。
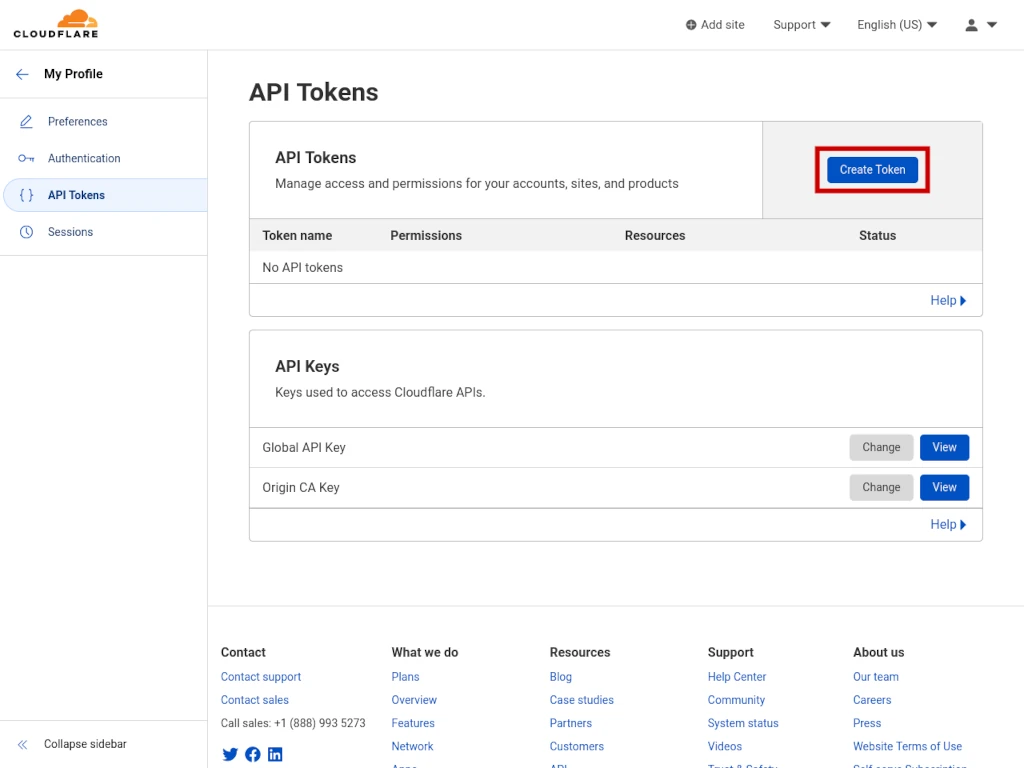
右側の青いCreate Tokenをクリック。
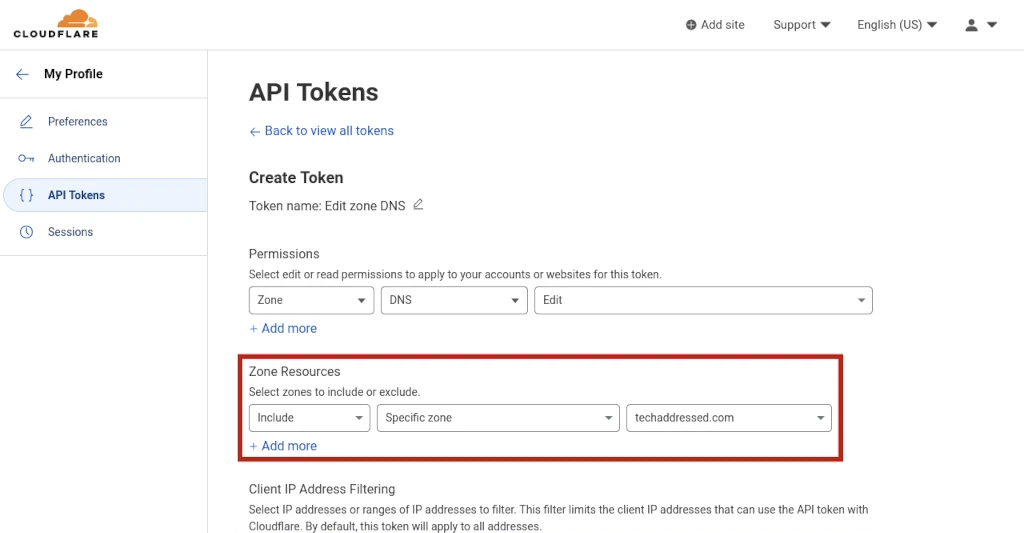
ZONE RESOURCES項目で、INCLUDEーSPECIFIC ZONE ー(TOKENを作成したい)ドメインを選んで、青いContinue to summaryを押す。
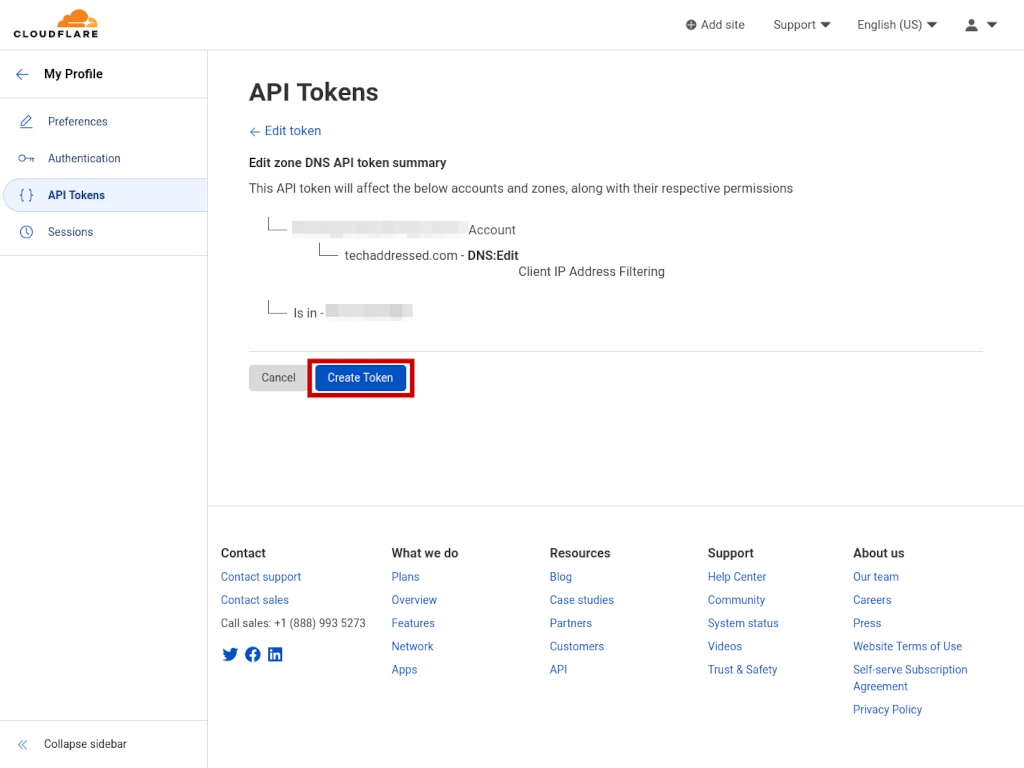
次の画面でCreate Tokenをクリック、TOKENを作成する。
画面に従い、作成したTOKENの有効性をテスト。問題なければコピーをしてCertbotインストールに使う。
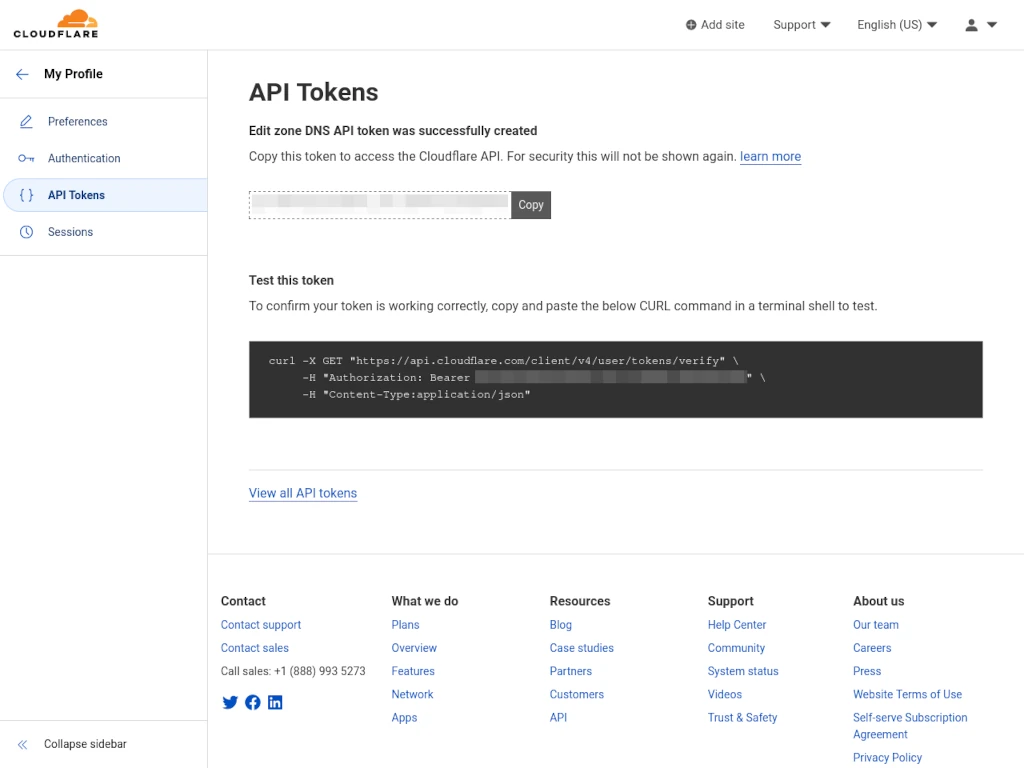
curl -X GET "https://api.cloudflare.com/client/v4/user/tokens/verify" \
-H "Authorization: Bearer NS4ZC3Y6MTJD0IXPIM4QJ3L8BCF-BRDYX7JZ0VQW2M" \
-H "Content-Type:application/json"
{"result":{"id":"amlf9mwd02v1t837dy3bhb1rlsuuhaw2c","status":"active"},"success":true,"errors":[],"messages":[{"code":10000,"message":"This API Token is valid and active","type":null}]}%
2.certbot-dns-cloudflareパッケージのインストール
sudo apt install certbot python3-certbot-dns-cloudflare nano -y3.認証情報ファイル作成
sudo mkdir -pv /etc/letsencryptsudo nano /etc/letsencrypt/cloudflare_secret.inicloudflare_secret.iniファイルに下記を記入、セーブする(TOKENは先ほど取得したものを使用)
dns_cloudflare_api_token = abcdef0123456789abcdef0123456789abcdef01sudo chmod 600 /etc/letsencrypt/cloudflare_secret.ini4.証明書の取得
まずはdry-runを実行する。
メールアドレスとドメインは適宜変更。
sudo certbot certonly \
--dry-run \
-n \
--agree-tos \
--dns-cloudflare \
--dns-cloudflare-credentials /etc/letsencrypt/cloudflare_secret.ini \
--dns-cloudflare-propagation-seconds 20 \
--email [email protected]
-d *.example.com \
-d example.com--dry-runオプションを外し、実際に証明書を取得する。
メールアドレスとドメインは適宜変更。
sudo certbot certonly \
-n \
--agree-tos \
--dns-cloudflare \
--dns-cloudflare-credentials /etc/letsencrypt/cloudflare_secret.ini \
--dns-cloudflare-propagation-seconds 20 \
--email [email protected]
-d *.example.com \
-d example.com
証明書は
公開鍵: /etc/letsencrypt/live/example.com/fullchain.pem
秘密鍵: /etc/letsencrypt/live/example.com/privkey.pem
といったパスに作成される。
5.証明書の更新
証明書の更新はrenewコマンドで行う。
sudo certbot renewテストは sudo certbot –dry-run renewを使う。
crontabで下記のような定義を入れておけば、毎月1日3時に更新となる:
0 3 1 * * certbot renew6.応用例:MAILCOW
- 適宜の名前で下記Post-hookスクリプトファイルを作成(例:renew-certs.sh )、/etc/letsencrypt/renewal-hooks/postに置く。renewの際に自動実行してくれる:
#!/bin/bash
cp /etc/letsencrypt/live/my.domain.tld/fullchain.pem /opt/mailcow-dockerized/data/assets/ssl/cert.pem
cp /etc/letsencrypt/live/my.domain.tld/privkey.pem /opt/mailcow-dockerized/data/assets/ssl/key.pem
postfix_c=$(docker ps -qaf name=postfix-mailcow)
dovecot_c=$(docker ps -qaf name=dovecot-mailcow)
nginx_c=$(docker ps -qaf name=nginx-mailcow)
docker restart ${postfix_c} ${dovecot_c} ${nginx_c}- shファイルに実行権限を与える:
chmod 775 /etc/letsencrypt/renewal-hooks/post/renew-certs.sh- きちんと動くかテスト
sudo certbot --dry-run renew- エラーコード127出た!(焦った…) 検索しまくった結果、パス通っていないらしく、shファイルの#!/bin/bashを#!usr/bin/bashに変更したらテスト成功した。次の日もとの#!/bin/bashに戻してみても問題出なかった、再起動したからかな?よくわからん…
- MailCowに付いているLEの発行を無効にする。
Disable Let’s Encrypt completely
Set SKIP_LETS_ENCRYPT=y in “mailcow.conf” and recreate “acme-mailcow” by running docker compose up -d.
7.参考サイト
Using Certbot From Behind Cloudflare’s Reverse Proxy – Tech Addressed
https://eggpan.net/post/ubuntu-certbot-dns-cloudflare/

